Author Archives: meredith

Designing the Invisible

6
Filed under Uncategorized

What has stood out the most when attempting to engage in the design of new proteins is that practically nothing can be seen.

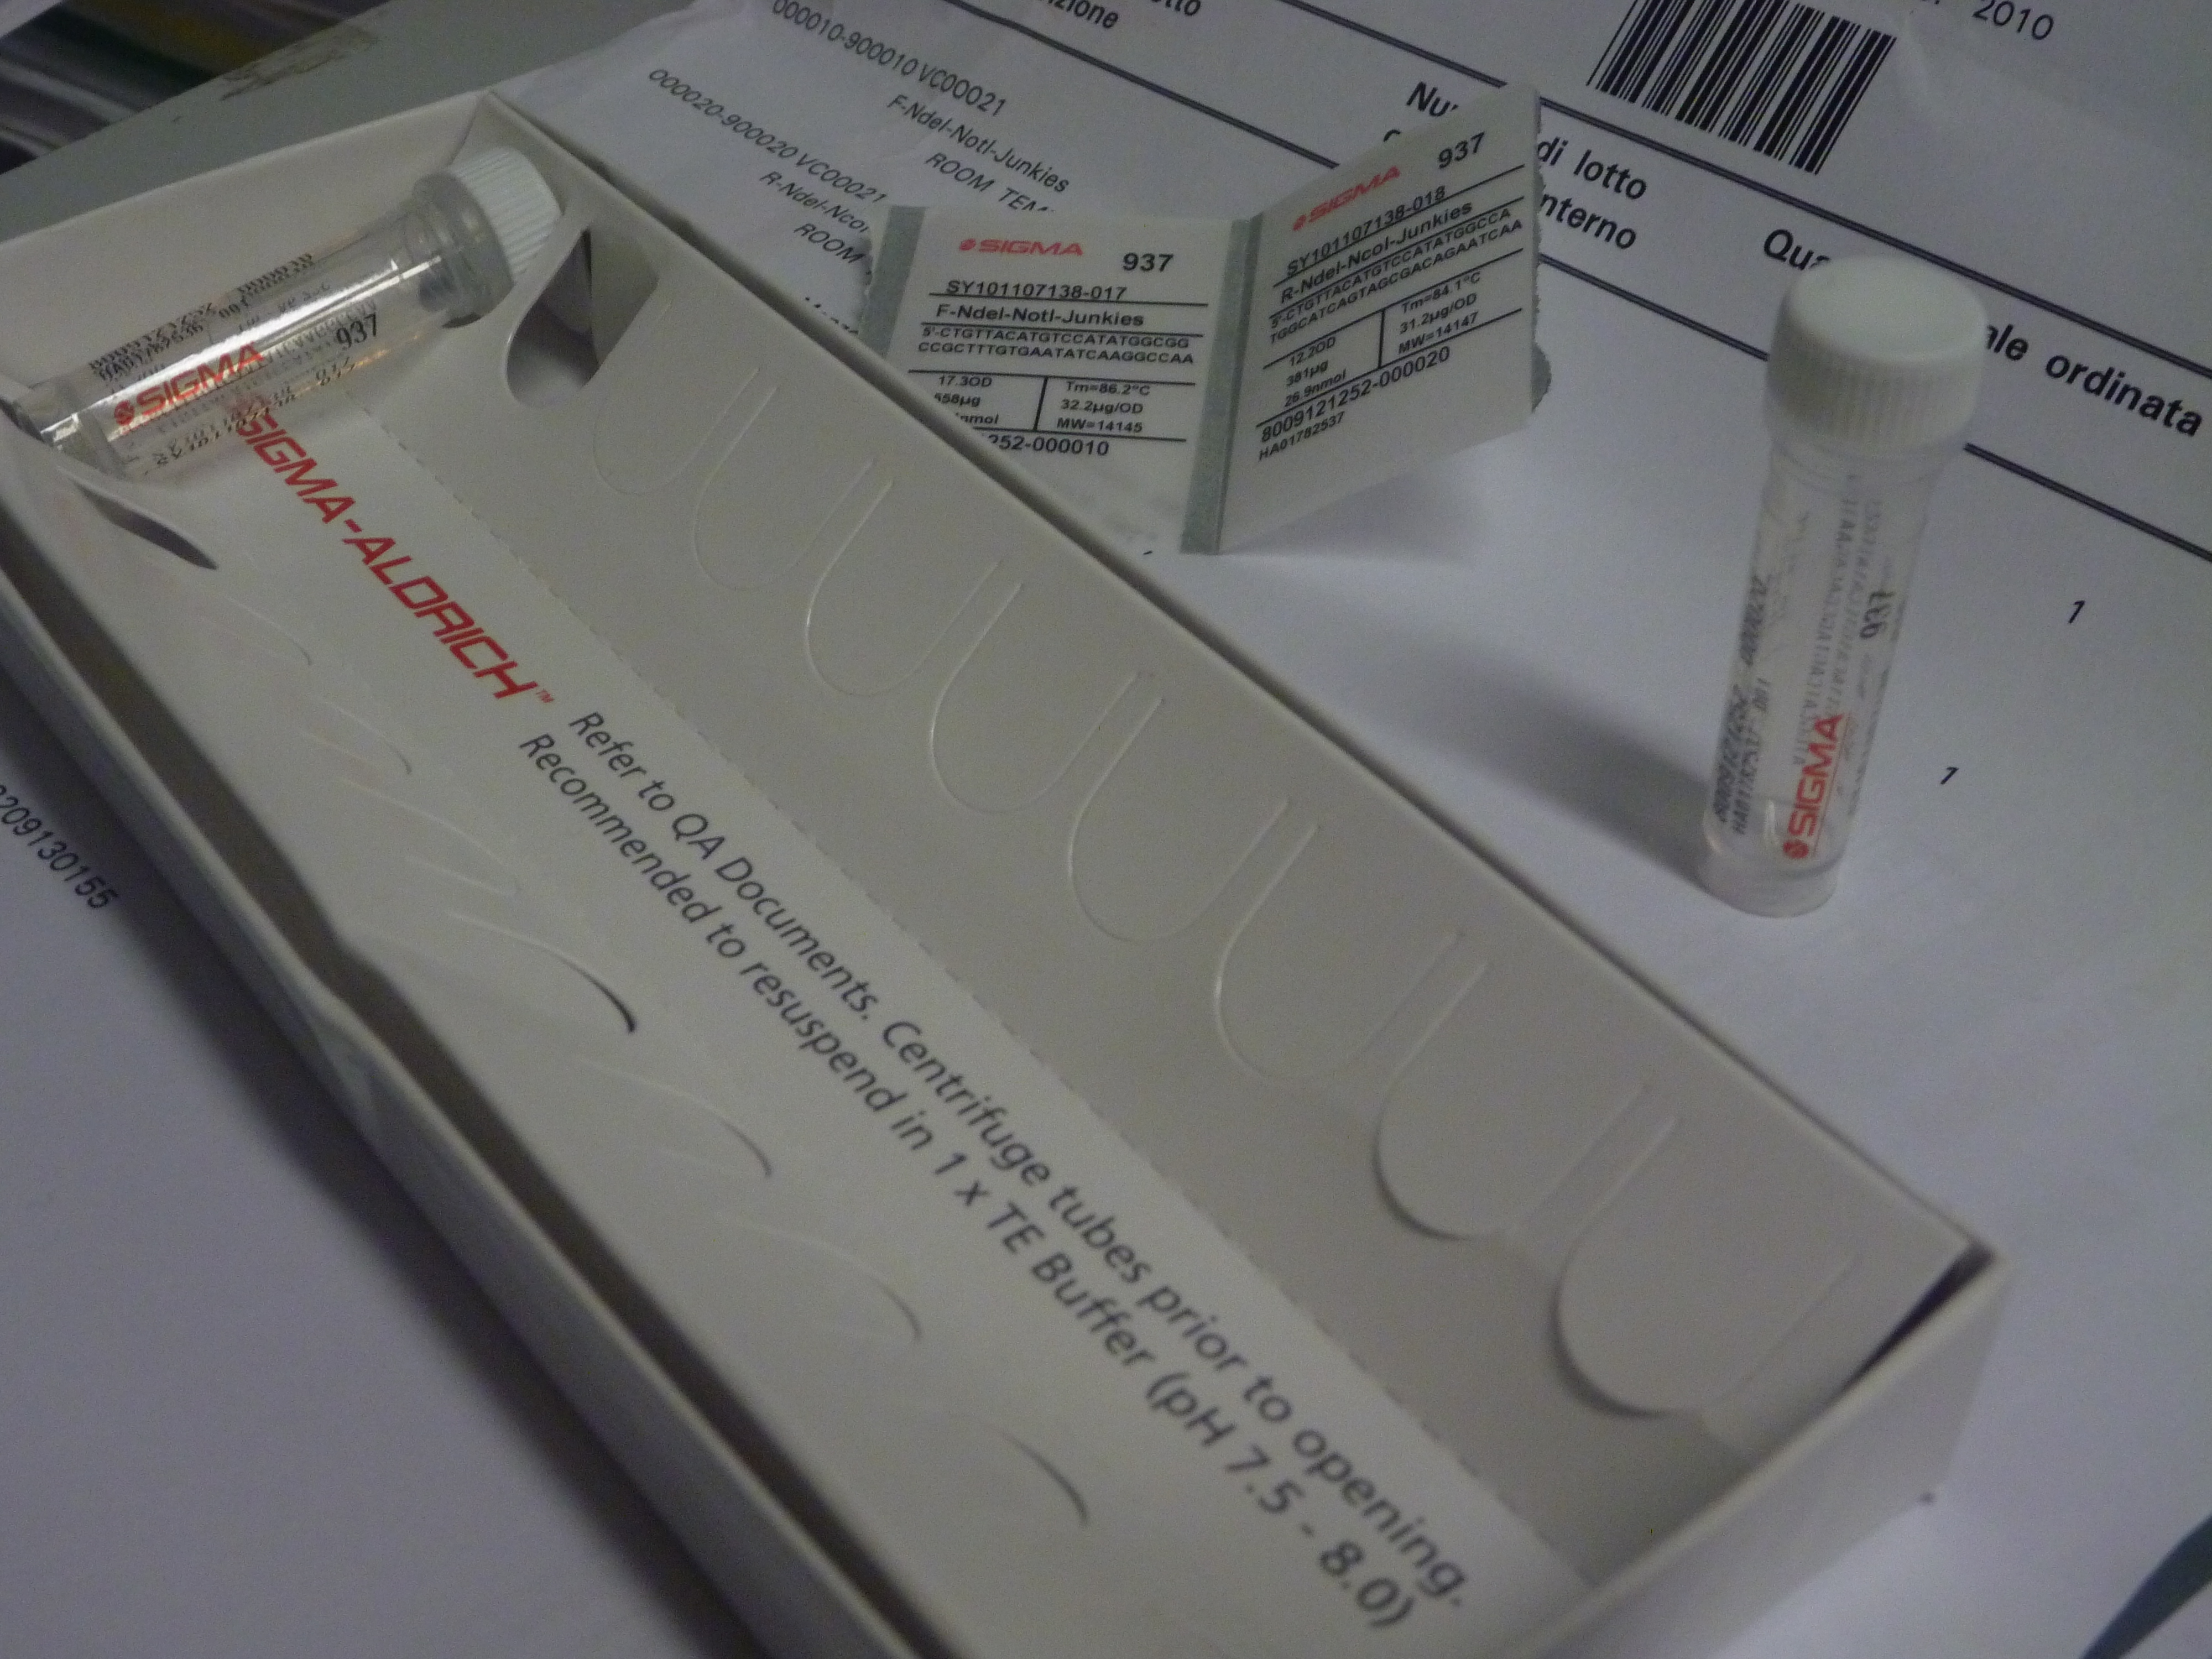
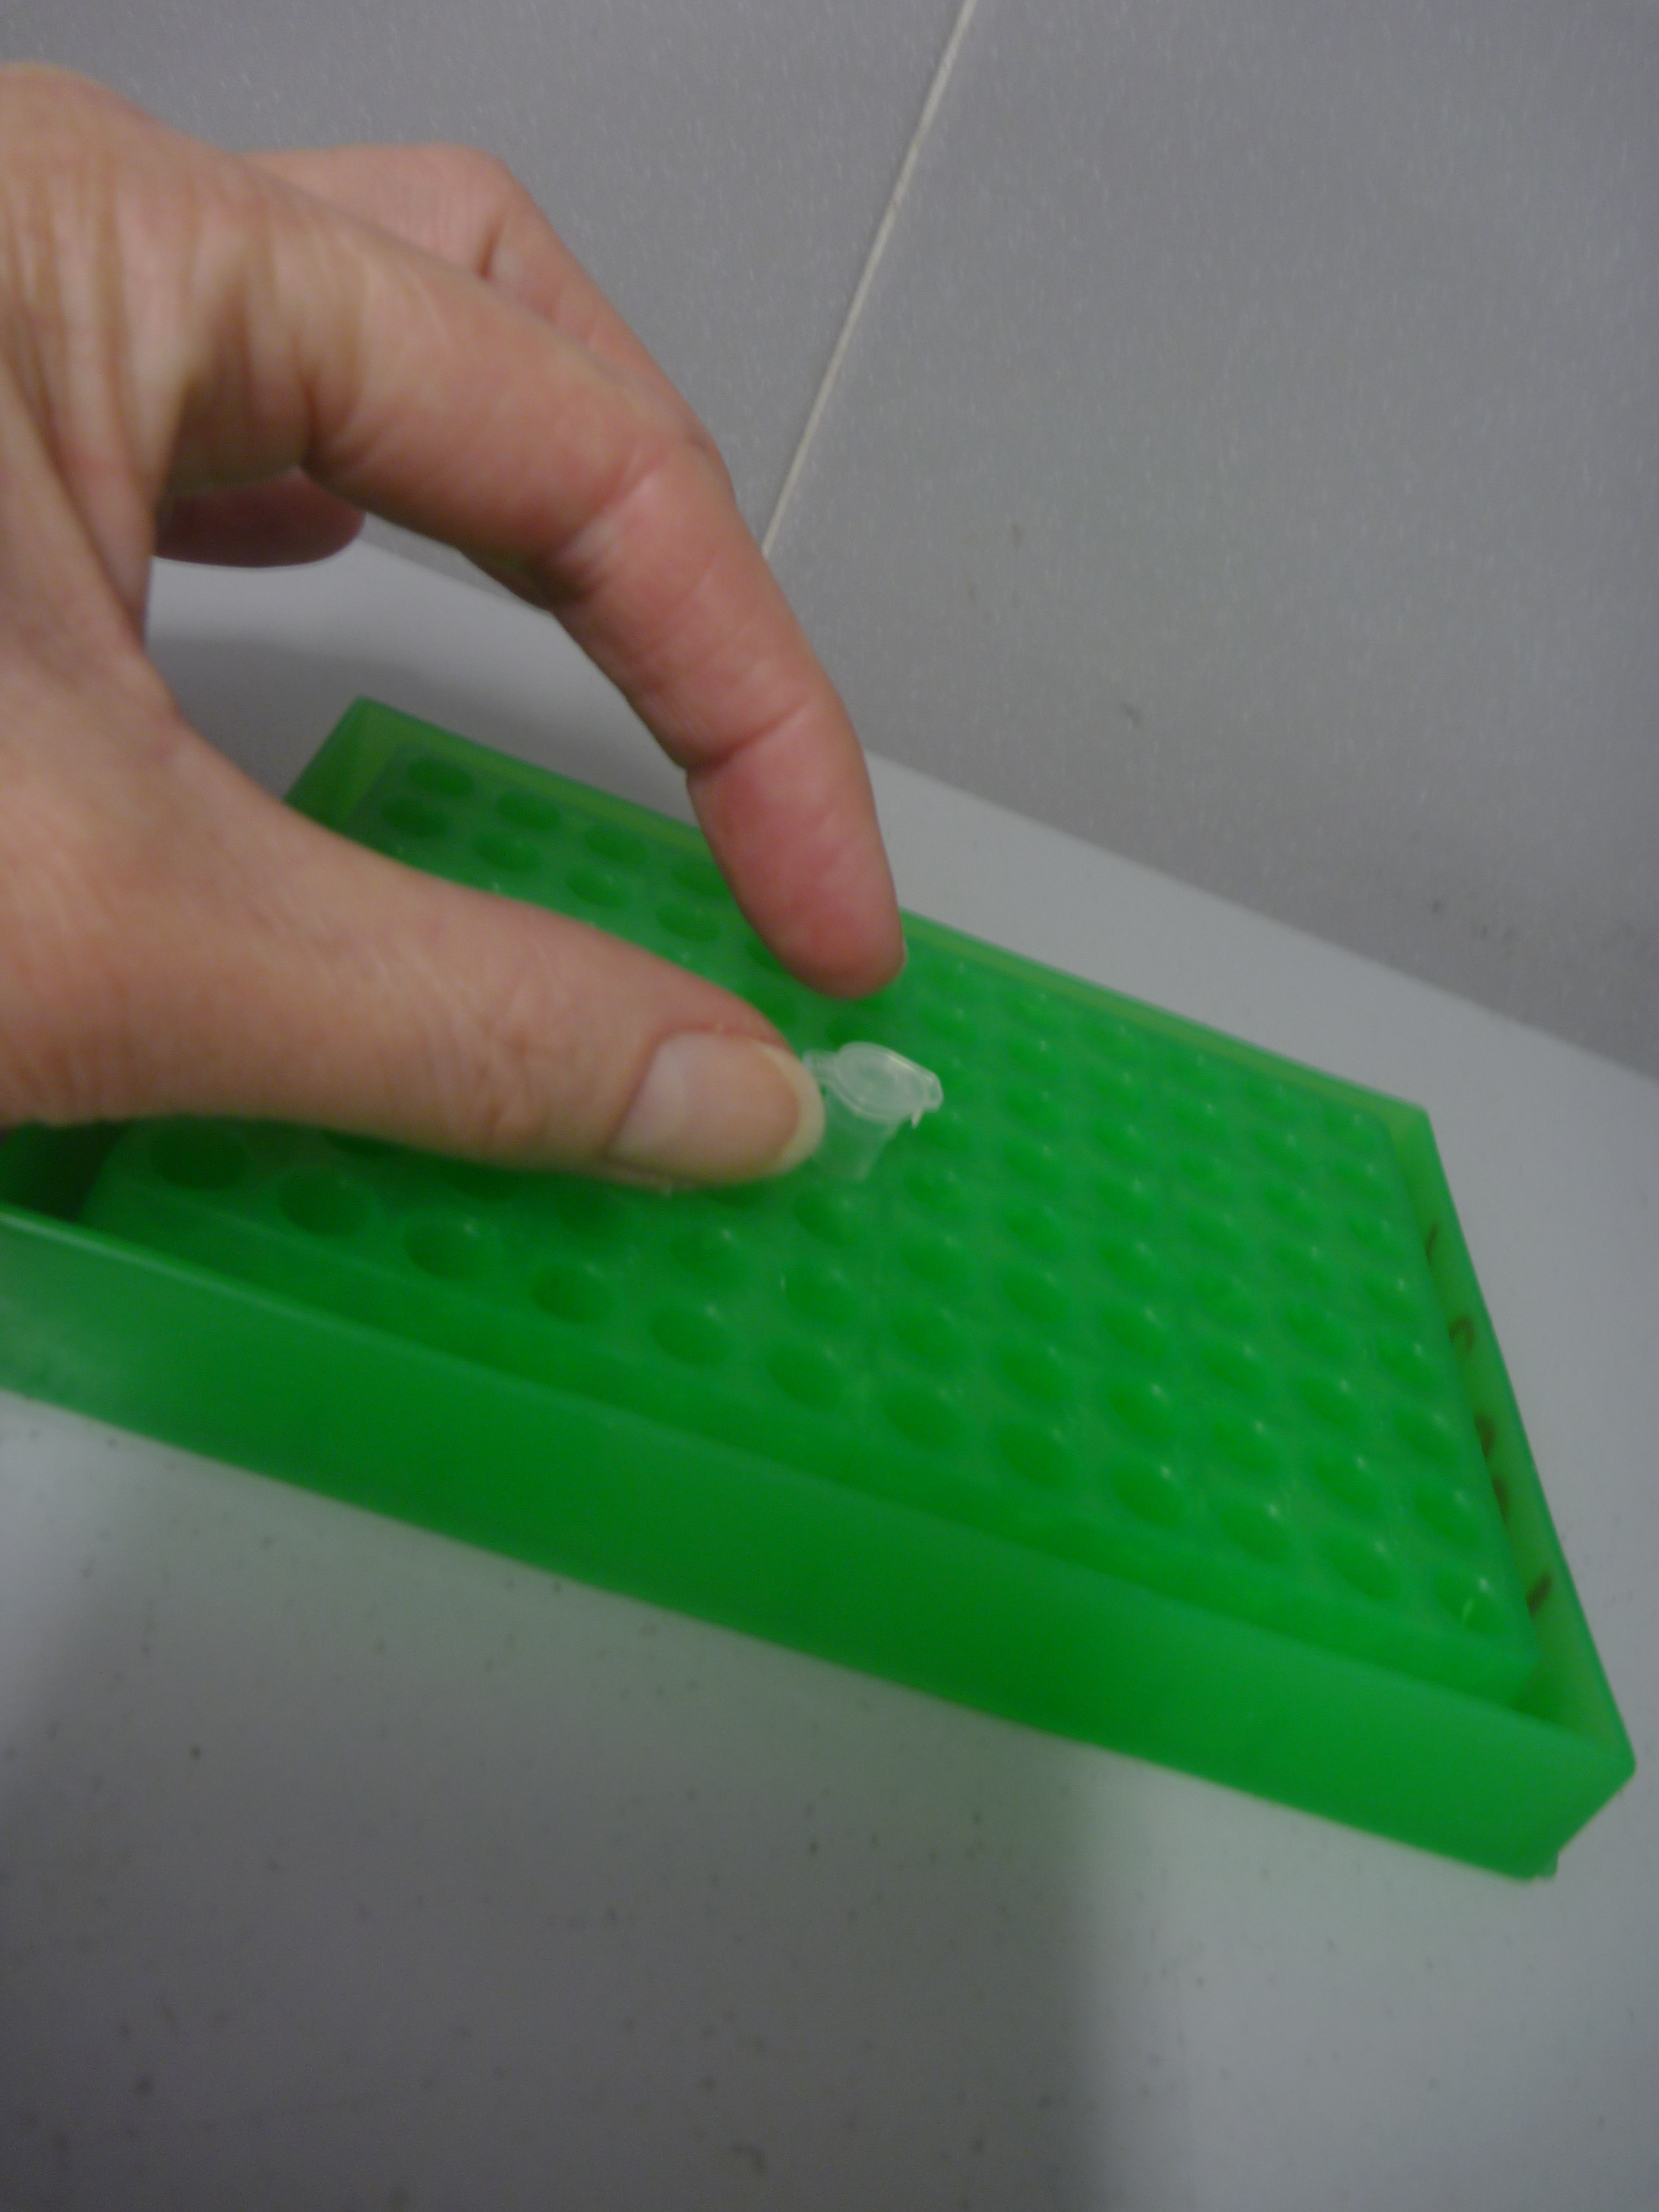
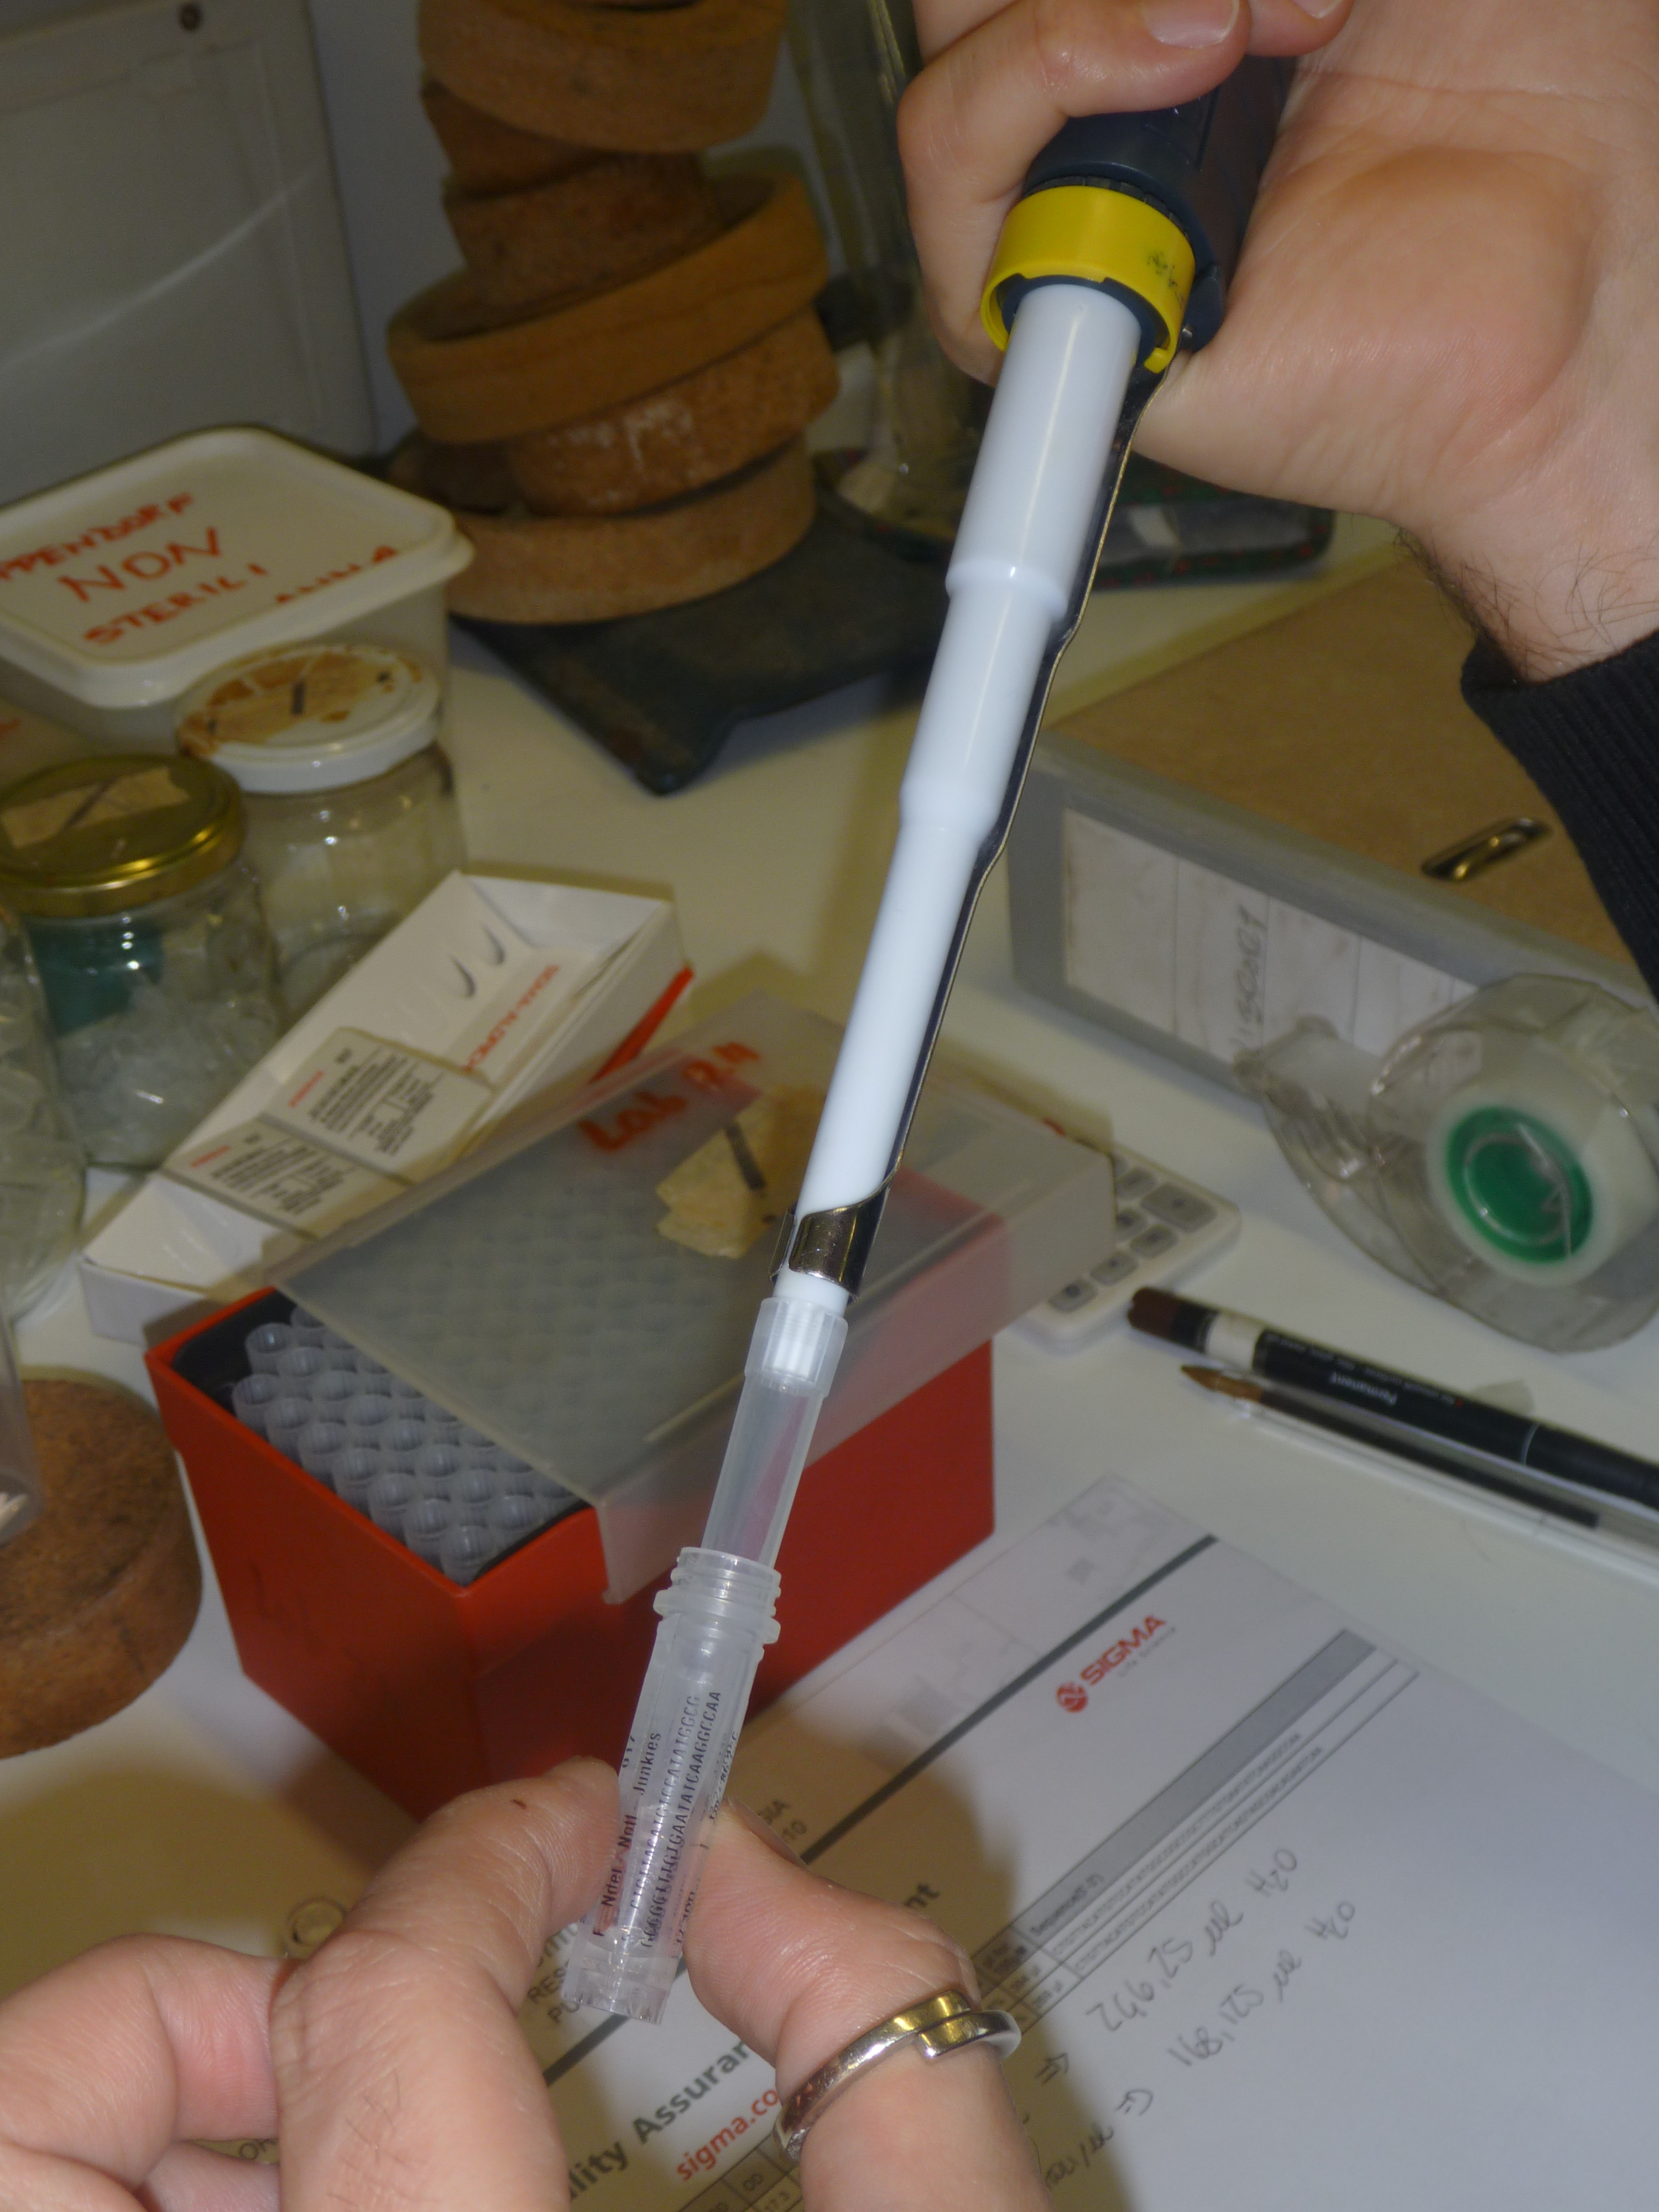
All steps in the synthesising process, involve pipetting microlitres of what appears to be clear liquid from one vial to another, occassionally punctuated by tiny pellets of material which appear after the liquids are centrifuged.

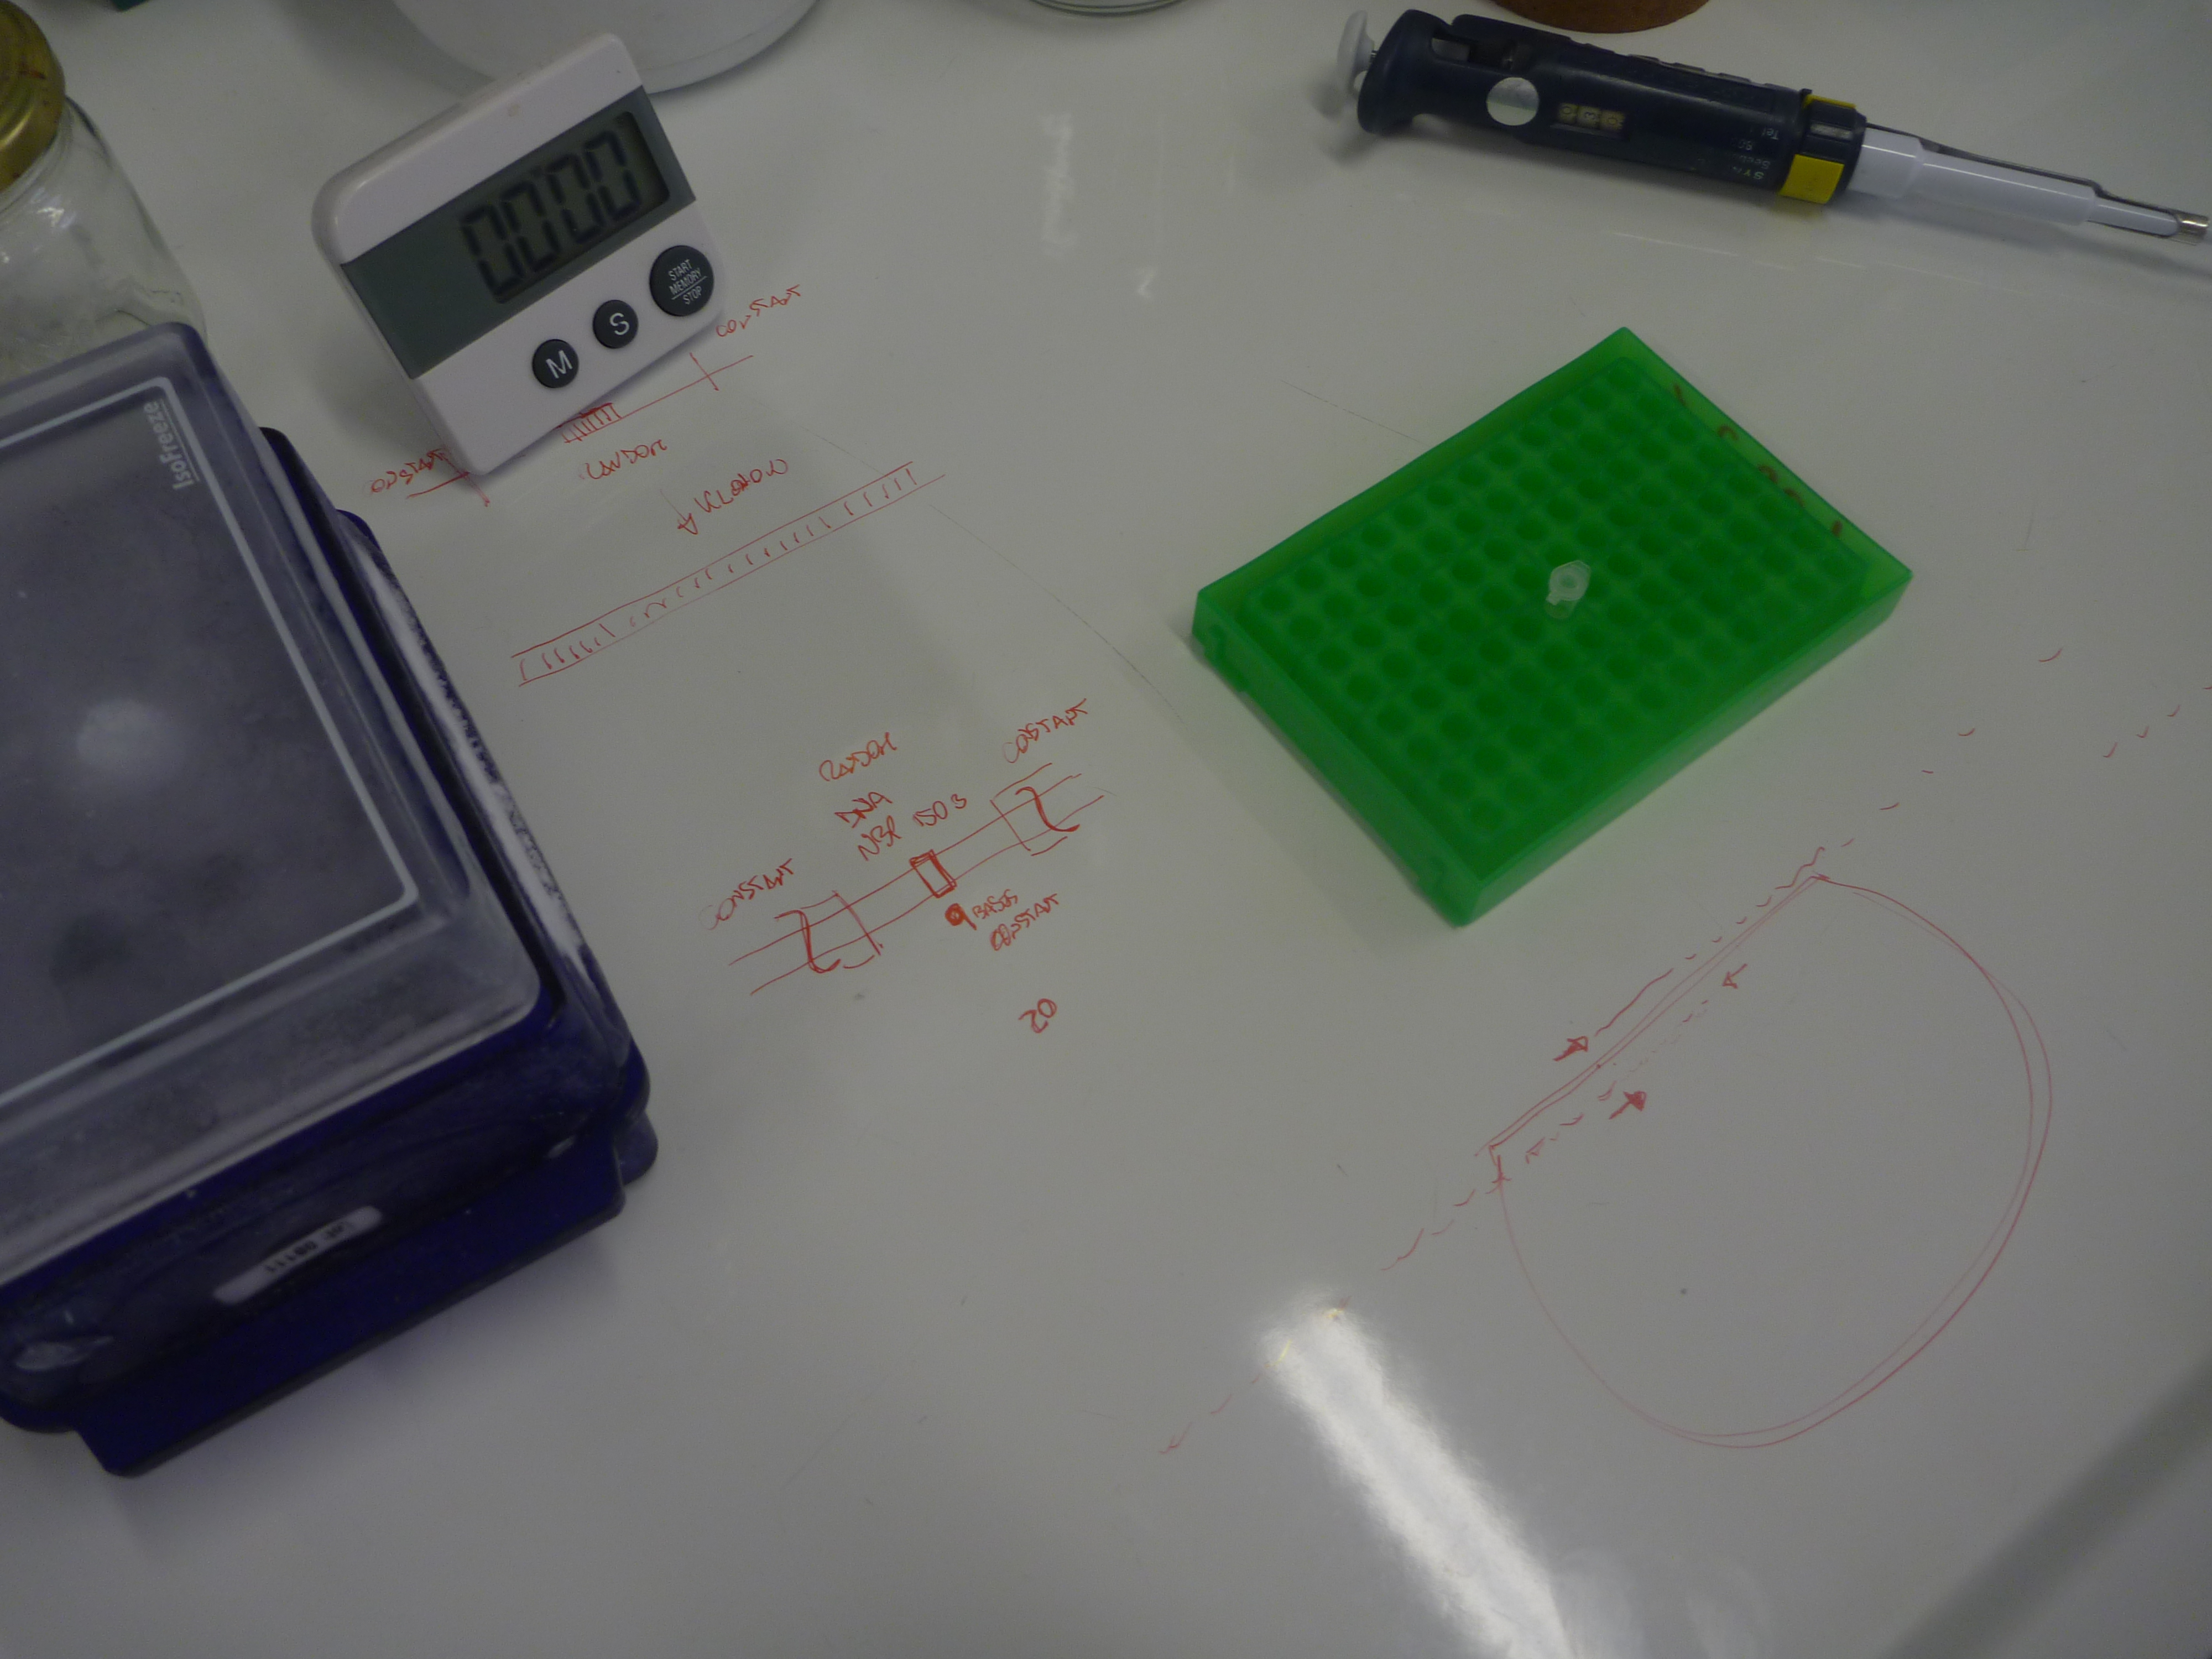
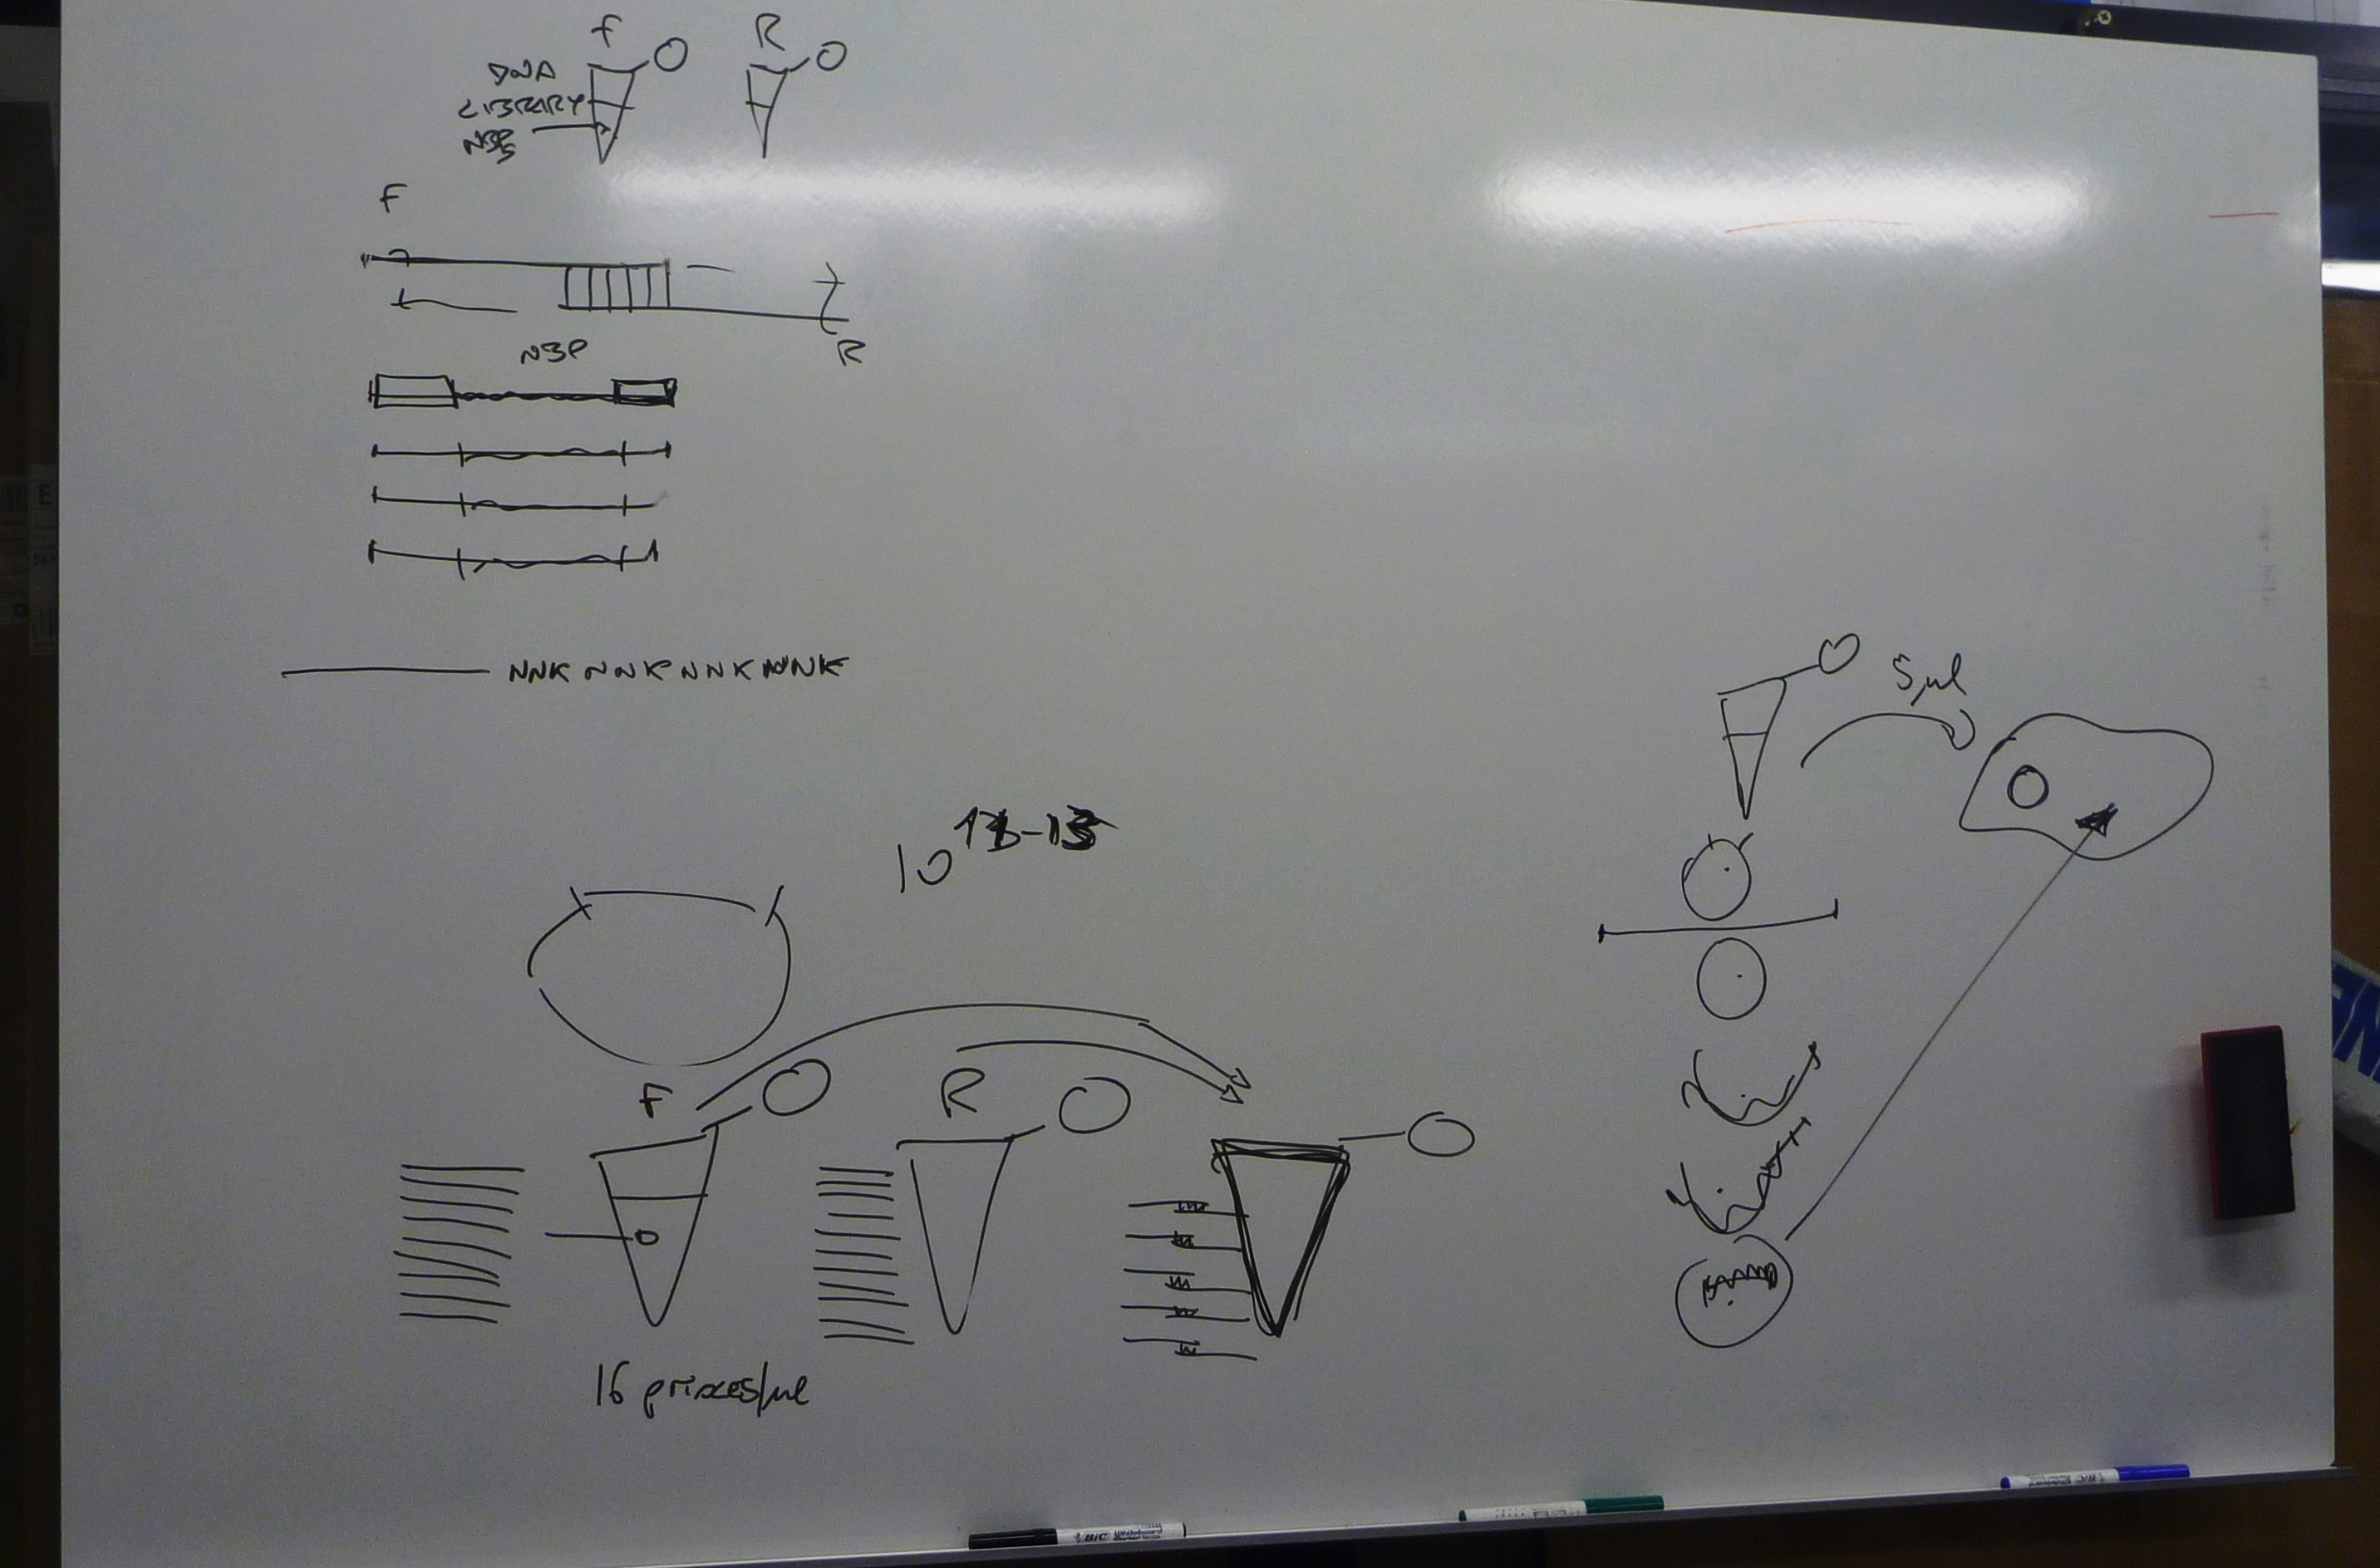
Given the aim of my research project is to focus on the aesthetic generation of protein shape, it is ironic not to be able to see what we are attempting to create. All steps that I have described in the last two blogs, have first involved drawing diagrams on whiteboards or scraps of paper of intricate processes, such as DNA transcription and translation, before doing the actual step in the experimental process: ligating the plasmid, inserting the DNA fragment, or transforming bacterial cells for example.

At times synthesising proteins feels like an act of experimental faith: a blind adhesion to a new kind of alchemy that promises to transform liquid into life.

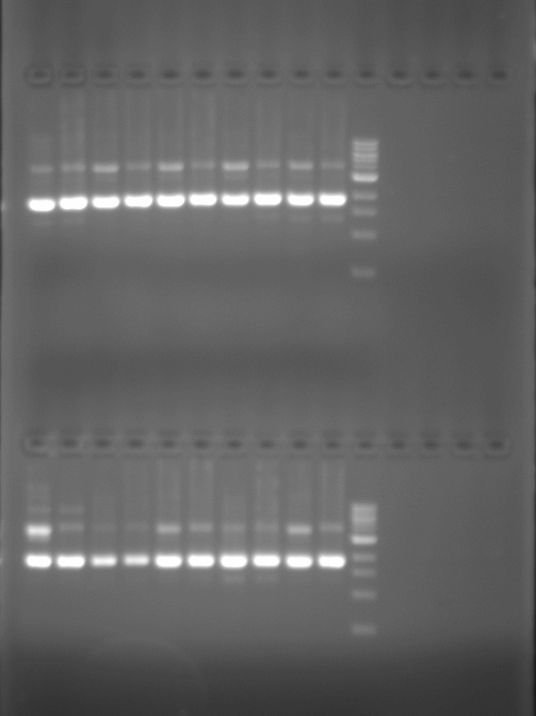
At a glance, it could be argued that designing synthetic proteins involves a radical cleaving of material processes from the experimental techniques of their making; that the language and graphics through which protein design is articulated is separate from the chemical-biological act of their physical manipulation. However, after each step in the synthesising process, a physical test is conducted to see if the procedure was successful. For example, to pipette the “products” potentially produced at various steps of the synthesising process into the wells for our gel tests, we added a coloured dye to be sure that we were able to see the micro-amount of liquid we were inserting.

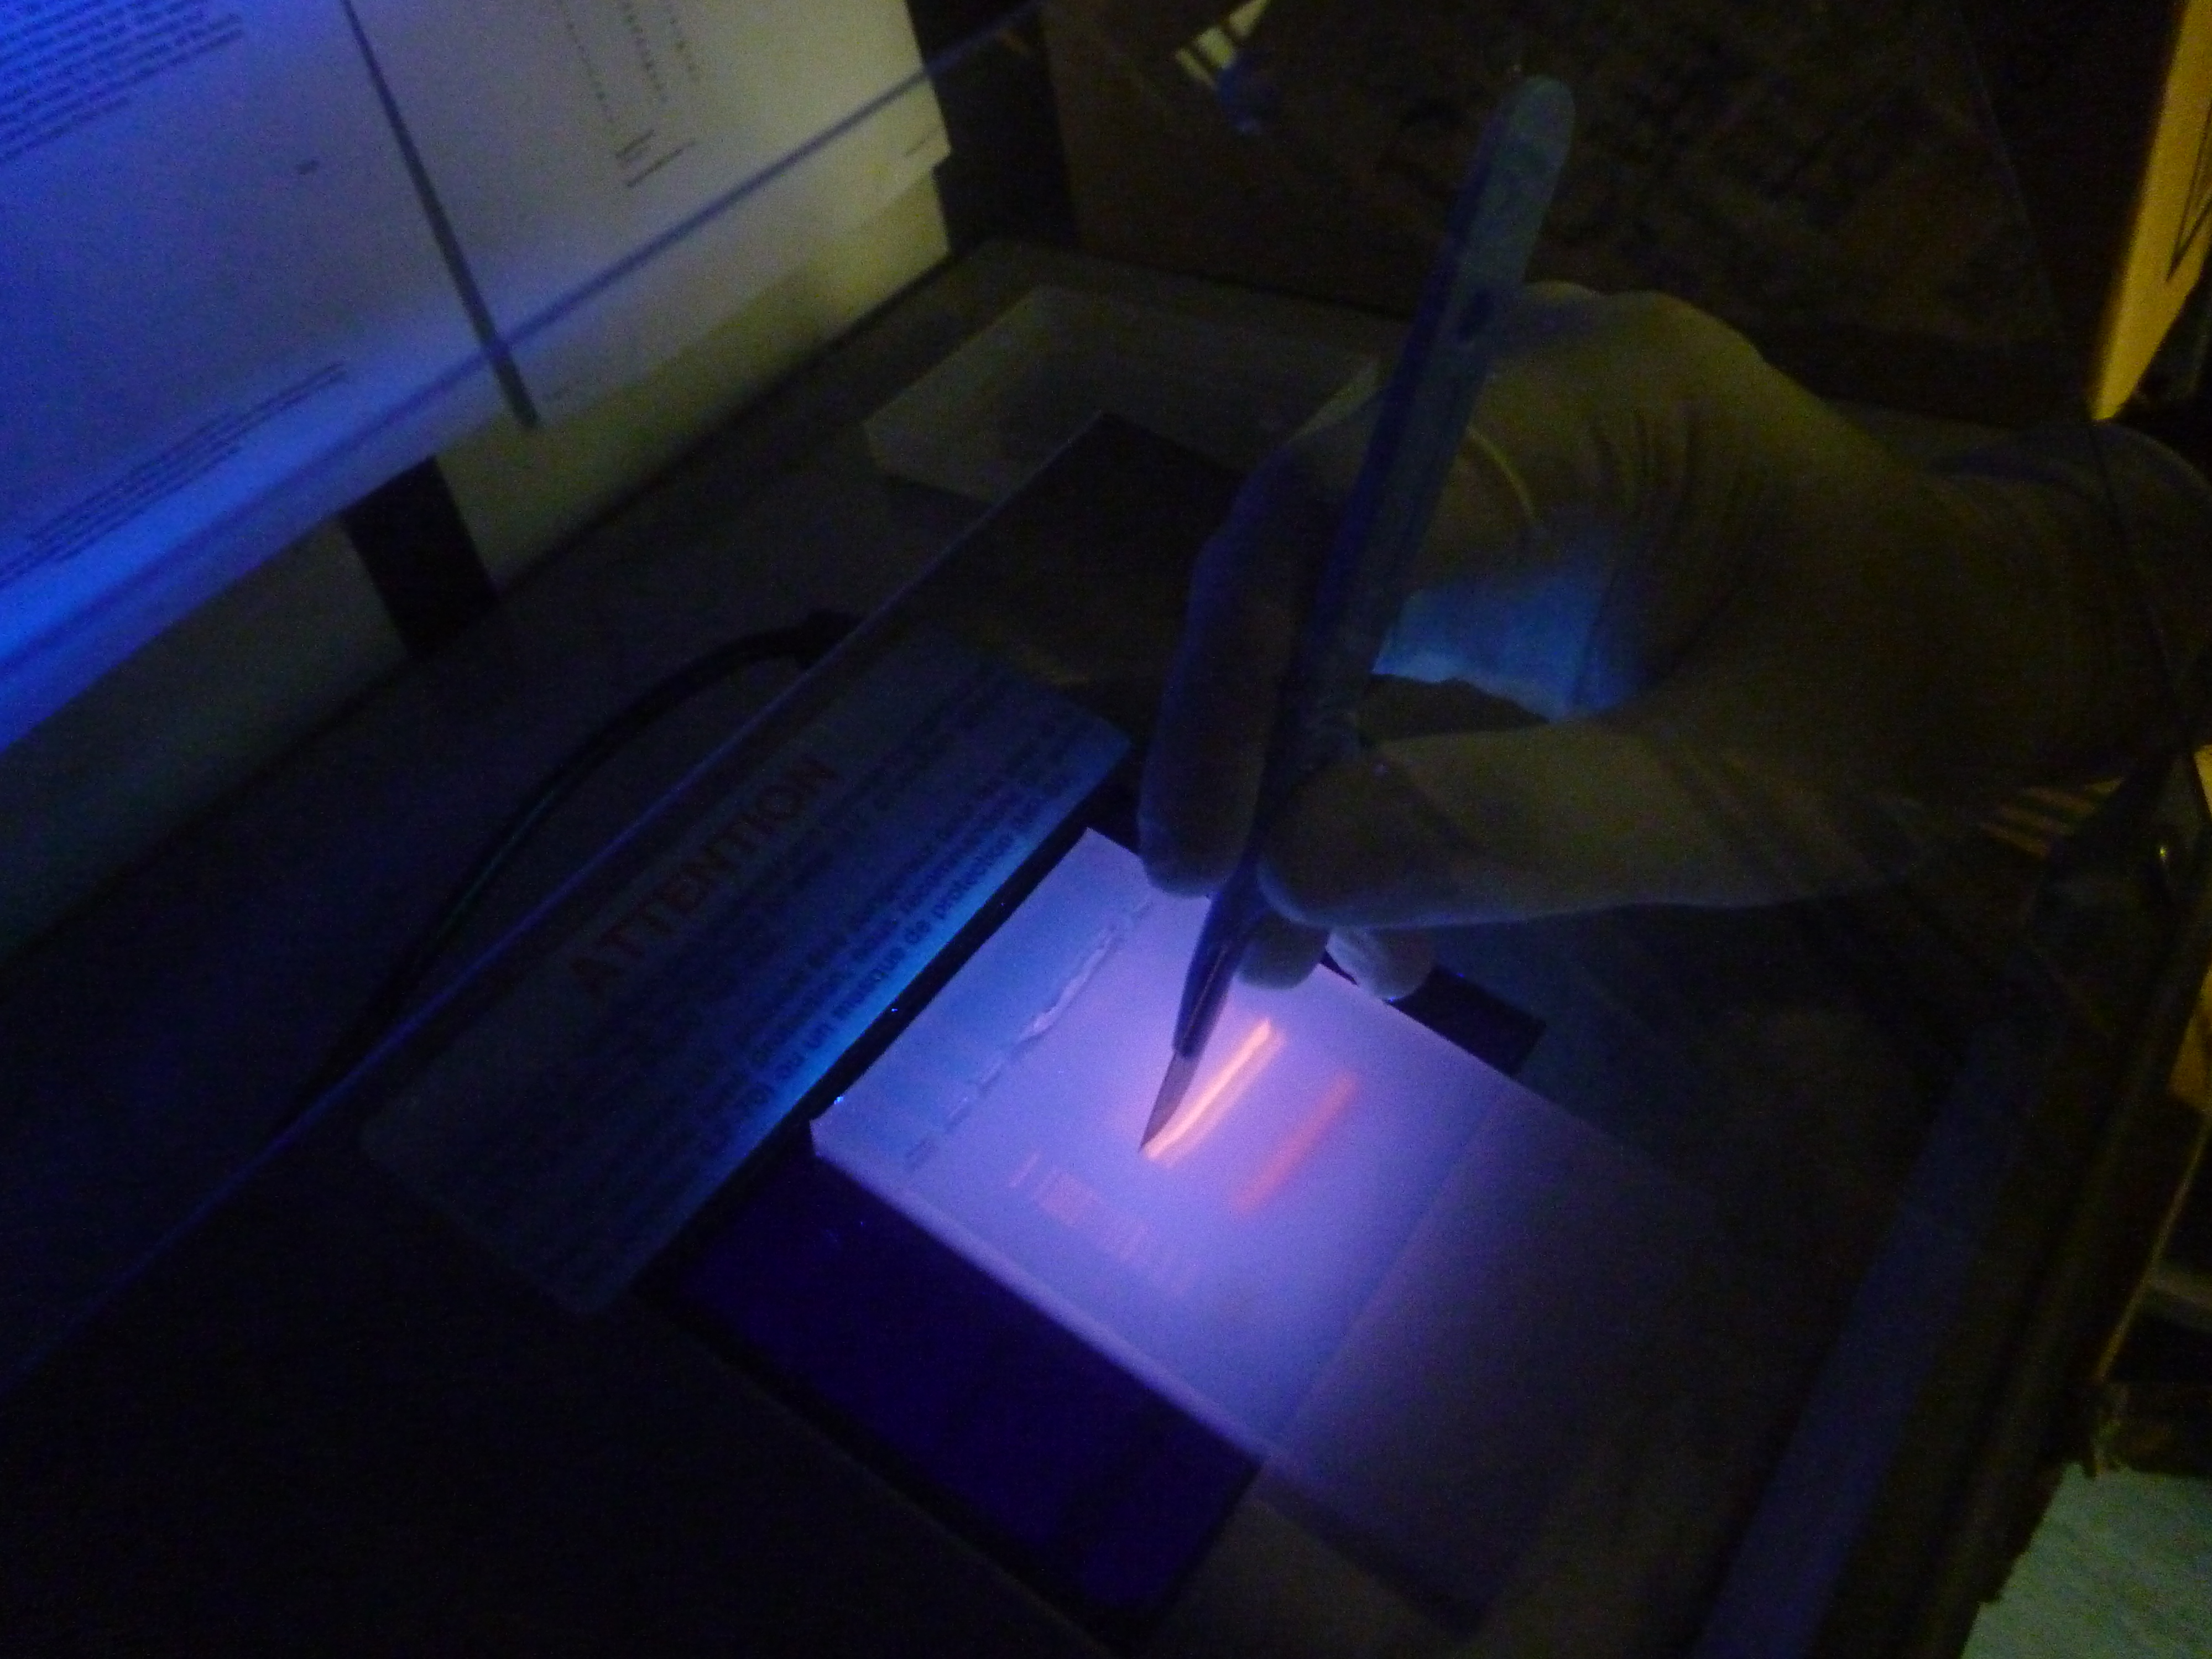
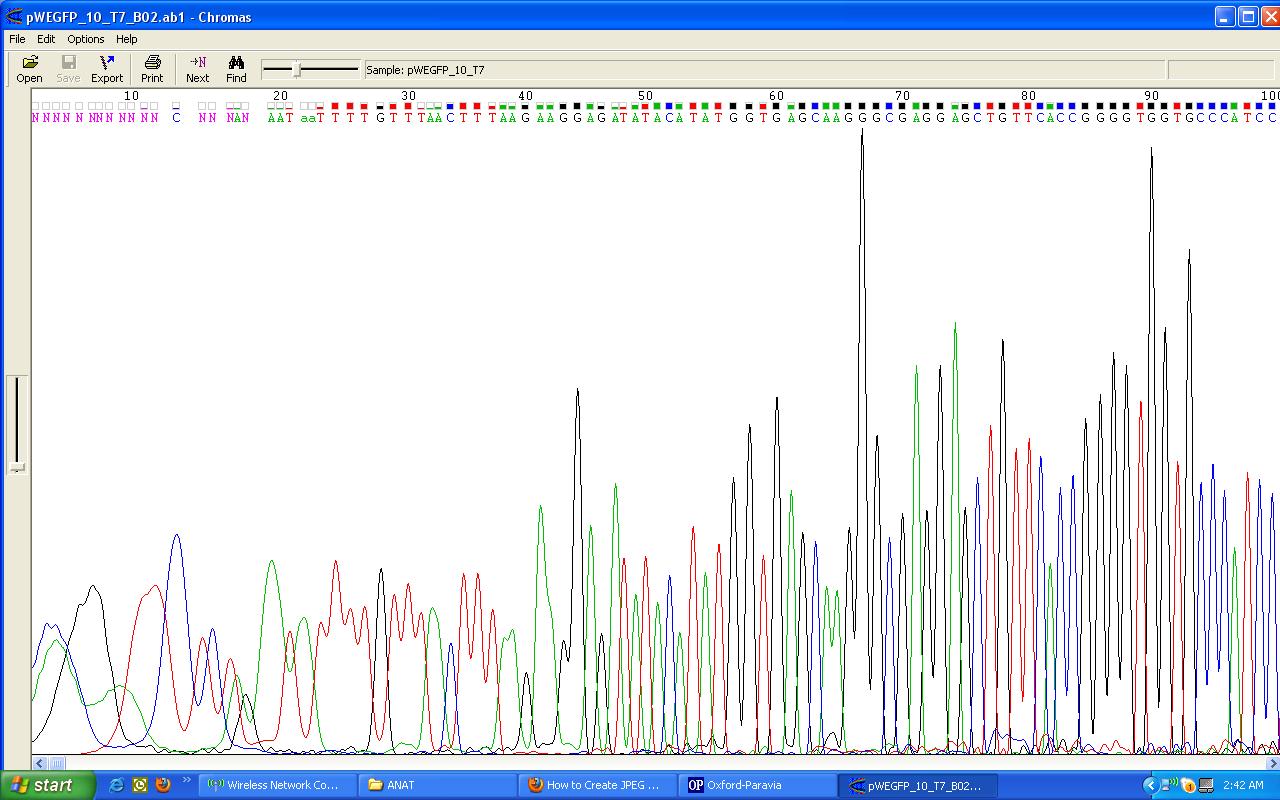
And for the results to be seen in our tests, we added ethidium bromide to the gel which enters the DNA structure, allowing it to be seen under UV light. While these techniques rely on adding the means by which to visualise the micro-volume of reaction to the experimental product or to the material in which it will be tested, experimentally they at least indicate the material connection between their practical implementation and scientific articulation. Though at times the interpretation of the results is ambigous, these test functions in a similar way to those of forensics: evidence of events that have taken place are read from the physical marks which they leave.

However, no visual machinations of DNA manipulation are present in the actual laboratory process. Nothing of the intricate machinations of genetic manipulation and cellular transformations are be seen. No direct visualisations of the biochemical processes taking place are available in the way that might be understood for tissue culture for example, which uses a microscope to see material transformations of cells, and often video capture to record their changes.

When the experimental process is predominantly evidenced by trace, it begs the question: where does this leave protein design generally, and in particular relation to my project, its aesthetic and creative engagement?

When we speak of design, it is commonly understood as a process which is ultimately expressed in a tangible way that translates what is developed on the computer, whiteboard, or drafting pad in to a physical functioning object: a building, a car, a piece of furniture. However, in protein design this process frequently occurs in silico, using scriptural and visual forms: the DNA code of GATC, and its corresponding expression as the 20 letters that code for amino acids, the visualisations of how stands these codes fold into the structural functional forms of proteins. But none of these processes can actually be seen in the minute amounts of material being manipulated during experiments. Well not often anyway. Xray crystallography can be used to visual the protein structure. Indeed, it is used to verify whether what has been designed has actually occured and matches with what was intended. However, it is not a readily usable research tool as it is extremely time-consuming and expensive, and so is effectively a procedure in itself that takes place after an experiment is conducted.  On the basis, what is visualised through xray crystallography arguably doesn’t directly form part of the visualisation of protein syntheis, but is a trace of an experimental process.

How then, can we speak of design when design process takes place through textual and visual forms that are not part of regular laboratory practice, and cannot be evidenced through direct visualisation? What is the relation of the language and instruments of design when their actual implementation is invisible?

Proteins that Glow.

9
Filed under Uncategorized

Today we got back the results of our DNA sequencing. And it confirmed that we had indeed inserted our DNA fragment!  After two attempts, this is great news.  Not because we have now synthesised a protein.  But because it allows us to move forward with our experiment and attempt to do so.  First, however, to our positive result.  As with our earlier attempt to insert the fragment into the plasmid, once we had completed the insertion step, and thought it likely that we had successfully done so, we sent a sample of our plasmid with our putated fragment insert to a commercial company for sequencing.  And as with last results we obtained,  the sequence of our plasmid was visualised as a chromatogram and sent to us via email.

While the plasmid is sequenced by a commercial laboratory, the company does not confim or otherwise, whether or not we successfully inserted the DNA into the plasmid.  It just sequences the plasmid; and the reseacher(s) interprets the results.  As Cristiano knew the sequence of the DNA fragment we inserted, he was able to readily locate the order of the bases, and identify it within the full plasmid sequence that was returned to us.

Finally having the confirmation we need that we inserted the fragment, we can now proceed to remove it.  The fragment was only a dummy:  a spacer to prepare the plasmid for the DNA we actually want to insert.   I say fragment and plasmid but actually it is a case of fragments and plasmids: we prepared many more than one plasmid -in a single insertion process – with a dummy fragment and will insert a different DNA sequence into many more than one plasmid.  The DNA fragments which we will insert are known as NBP’s (Never Been Born Proteins). NBP’s are a randomly produced library of DNA sequences that code for amino-acid chains that haven’t been selected for by nature.  Potentially, these amino acid chains fold into protein structures by which they could become functional.  However, only a small sample of all possible protein sequences and are thought to have been sampled by nature. Using a 50 residue polypeptide as  a relatively short protein sequence that may be formed out of a combination of twenty known amino acids, there are ten to the power of 65 possible protein sequences -which is an astronomical number -which may occur.  Increase the length of the sequence and the number increases even more.  Due to the vastness of possible amino acid sequences, and the relatively small of amount of known extant proteins, it is hypothesised that nature could not have possibly sampled all possible amino acid sequences, in its selection of those that exist.

By randomly producing new DNA sequences, the Luisi Lab has developed new proteins from the vast possiblities of sequences that have not been selected for by nature.  However, while new amino acid sequencs can be produced it does not necessarily mean they will fold into functional proteins.  While the amino acid sequences are structurally expressed (in cells), there is no immediate way to know whether any or all amino acids sequences have actually folded into structured proteins. Therefore, a secondary means is currently neccesary to identify whether the folding process has taken place.

In the experiment we are currently doing, we are attempting to integrate the possible expression of the amino acid chain into a folded structure with the means by which it is identified.  Using GFP (green fluorescent protein)  -itself a functioning protein structure -inserted into the plasmid DNA as a folding reporter, in relation to which we positioned our NBP insert so that if forms part of the DNA sequence to be transcribed and translated into an amio acid chain, we hope to be able identify whether we have structured NBP’s: if the NBP’s have been inserted, as they are proteins which function when structured, they will glow.

Today we cultured the first cells with our NBP-eGFP inserts.  But will they glow?

Repeating the Insertion of a DNA Fragment into a Plasmid

9
Filed under Uncategorized

As my project takes a design approach to engage with a proposed second phase of the Luisi’s lab random synthesisation of proteins, it has been necessary for me to continue to focus on the technical process of doing so.  While the process I have described so far is the initial step in synthesising a protein, it is essential for me to understand regardless of  the specific techniques we use to attempt to produce a novel protein.  Moreover, understanding and participating in synthesising a protein is a necessary step in my project as it’s difficult -if not impossible -to collaboratively engage in the difference between randomisation and design techniques through actually synthesising a protein without understanding, and engaging in the experimental processed through which it is expressed.  As such, I am continuing to focus on the laboratory process of protein synthesis in which I am participating, while opening up our technical-practical the discussion to questions of design.

As our first attempt at inserting a DNA fragment into a plamid (which I should have explained in my first blog is an independent DNA molecule found in bacterial cells) was unsuccessful we repeated the process, with some changes.
The reason why the fragment did not successfully insert Cristiano surmised was because the plasmid we had cut so we could insert the DNA had rejoined (self-ligased) without the insert.  To prevent this occurring again, we added an enzyme into the solution we prepared for cutting another plasmid that would inhibit the plasmid from rejoining.  We then ran a test to check whether on this occassion we had been successful.  However, the test indicated that in all likelihood the fragment had only been attached to one end of the plasmid, forming a single length rather than a modified circle of plasmid DNA.

Despite out uncertain result Critiano decided to continue the cloning process and insert the plasmid into a bacterial host as the test is not always sensitive enough to register a positive result, and it is a relatively simple procedure to do.  By attempting to insert our modified plasmid into a bacterial cell (ecoli to be exact) if we had actually been successful in doing so, we hoped to isolate it from the other possible products that are produed when cloning DNA.  Rather than running a battery of tests to verify whether we had achieved our aim, on this occassion after isolating the plasmid DNA from the cells we sent it to a company for sequencing.

Unfortunately, once again, the test came back negative. (I’m told this is common refrain in bioscience.) The sequence returned to us was that of our original,  or wild-type plasmid as it is called when being modified (regardless of its actual biotechnological heritage). The results of the test are visualised as a chromatogram, which displays the genetic sequence as a colour coded graph.  I’ve included part of it below.

In brief, to visualise the DNA sequence dNTP’s (the separate bases, GATC, comprising DNA) modified with chromophores, (a chemical group capable of light aborption/refection within the visible spectrum) corresponding to their particular code of either GATC are added to the reaction. Then, when the DNA sequences is read each base is visible according to its assigned colour. The test also supplies the code in textual form and the corresponding amino acid sequence for which it codes.

The reason why we got a negative result Cristiano thinks is because the fragment did not have a long enough tail to which the enzyme could attach so that it could cut it, making the sticky-ends necessary to insert it into the plasmid.  His interpretation fits with his reading of the test that the fragment may have only been bound to one end of the cut plasmid;  Possibly, only one end of the fragment was made sticky when we prepared it for insertion. To rectify the problem, he will “design” new primers with longer tails so that the enzyme that cuts the ends of the fragment  are able to attach.

Inserting DNA into a Plasmid

2
Filed under Uncategorized

After a tenative start settling into Roma, my first full week in the Pier Luigi Luisi Synthetic Biology lab was no slow introduction; I found myself immediately involved in our first experiment to insert a DNA fragment into a plasmid. The first step in synthesising a protein Cristiano (postdoctoral fellow, and collaborating/advising scientist on this project) had inserted the fragment the week earlier.  When I arrived we began a process called PCR (polymerase chain reaction) which is generally used for gene cloning and DNA analysis, and which we used to replicate the DNA that was inserted into the plasmid to test whether it had actually been inserted.

Without recounting the process in any technical detail at this point, needless to say this was a steep learning curve. Cristiano took me through the technique, which involves many steps with precise measurments, over four-days. Under his instruction, I also executed a number of simple steps so I could slowly begin to develop the technical skill necessary to eventually do the process myself. While it could be performed by a technician, to understand the process in terms of its biological affects at the level of the DNA requires having to fast track genetics and protein synthesis 101.  Inserting a DNA fragment into a plasmid, however, doesn’t necessarily take the time we spent on it.  Not primarily because Cristiano was teaching me and this slowed the process down -though it undoubtedly did -but because we didn’t ultimately get a successful result.

After running our first check to see if the DNA fragment had been replicated -and so had been cloned into the plasmid -we intially got a positive test.  Using a standard electrophloresis gel test, the DNA fragment appeared at the point relative to the marker we used that it should,  indicating it had been inserted.

In this test the inserted DNA appears -the first white line reading top to bottom -at the expected point relative to the ladder which appears vertically on the right. The second white line is the remaining oligonucleotides we used to anneal the DNA molcules.

To double-check our initial positive result, before we sent it to another lab to read the DNA sequence, and so definately confirm that it in the plasmid,  we ran a second test.  After incubating the cloned bacteria with nutrient solution to gain a greater amount of bacterial cells with the insert and then isolating the plasmid DNA from the bacterial cultures, using a number of techniques (which are not really necessary to detail at this point) we performed a second eletrophloresis gel test.  However, this time the test was negative.  In contrast to the first text, the cloned plasmid with the insert did not appear.

In this test, the inserted D

In our second test the inserted DNA does not appear. For the test to appear positive either one or three bands of DNA would have had to be present. One band would indicate a successful insertion, and three both a successful insertion and the presence of plasmid DNA without the insertion in circular and supercoiled form.

Given that we now had two contradictory results, one positive and one negative, we ran a third type of test -a double standard measure -which we once again examined using eletrophloresis.   And once again, ufortunately the results were negative.

For this double standard test, we used two enzymes NcoI and NdeI to check whether the DNA was inserted into the plasmid. The NcoI test appears above and the NdeI test below. For the NcoI test either one or three white lines should appear: the cut plasmid with the DNA inserted, and two possible variations. For the NdeI test, two lines should appear: one for the cut plasmid and one for the uncut plasmid.

Having now confirmed the DNA fragment was not inserted into the plasmid, time was needed to consider why the insertion did not work.   For me, this was an opportunity to digest the experimental week that was, both in its technical detail, broader framework of synthesising a protein, and in relation to my project goals.